Quantcast
Channel: esl kids songs – ESL KidStuff Blog
Viewing all 53 articles
Browse latest View live

The Feelings Song

$
0
0

Download a new song from ESL KidStuff: The Feelings Song

The Feelings SongThe Feelings Song

Song Theme: Talking about Feelings and Emotions
Target Vocab: happy, sad, hungry, angry, scared, sleepy, sunny, rainy, lunchtime, eat, yummy, noisy, stormy, bedtime, sleep, good night.
Song Length: 1:58

An original song focusing on feelings in certain situations.  It has a nice, easy sing-along tune, and the last 2 verses have blanks where your students can sing the missing feelings words. Here is a sample:

 (Members can log in to download the full song)
 

Lyrics:

Verse 1:
When it’s sunny, I am happy,
When it’s rainy, I am sad,
When it’s lunchtime, I am hungry,
Time to eat, yummy!

Verse 2:
When it’s noisy, I am angry,
When it’s stormy, I am scared,
When it’s bedtime, I am sleepy,
Time to sleep, good night!

Verse 3:
When it’s sunny, I am ____________,
When it’s rainy, I am ____________,
When it’s lunchtime, I am ____________,
Time to eat, yummy!

Verse 4:
When it’s noisy, I am ____________,
When it’s stormy, I am ____________,
When it’s bedtime, I am ____________,
Time to sleep, good night!


Gestures and activities to use with the “The Feelings Song”

The actions for this reflect the situations and their associated feelings.

  1. “When it’s sunny” (do round circle shape with your arms), “I am happy” (smile)
  2. “When it’s rainy” (wriggle your fingers like rain), “I am sad” (look sad)
  3. “When it’s lunchtime” (rub your tummy), “I am hungry” (look hungry)
  4. “Time to eat“, (gesture eating), “yummy!” (look happy).
  5. “When it’s noisy” (cover your ears), “I am angry” (look angry)
  6. “When it’s stormy” (gesture under an umbrella), “I am scared” (look scared)
  7. “When it’s bedtime” (gesture sleeping – head sideways on pillow hands), “I am sleepy” (yawn with hand over mouth)
  8. “Time to sleep, good night!” (yawn and wave goodnight)


Using The Feelings Song in class

With all the simple actions, this is a really fun and popular song to do in your lessons, with all ages.

  1. Teach the feelings vocab. On the board draw a large circle.Then draw two eyes, ears, nose and a smiley mouth. Do the same facial gesture and say “I’m happy! Happy, happy, happy”.  Get everyone to chorus “happy” and do the facial expression.  Then erase the mouth and draw a sad mouth (and maybe a tear under one eye) and teach sad.  Do the same for the rest of the vocab.
  2. Do “Draw the faces on the board”. Invite a student up to the front of the class and give him/her the chalk/marker.  Whisper a feelings word (e.g. “angry”) and get him/her to draw the face in the circle.  If he/she is having difficulty, show him a picture or flashcard. Invite the class to shout out the answers – the first student with the correct answer can draw the next picture.
  3. Play “Face draw” pairs. Put students in pairs and give each pair a large, blank sheet of paper.  Have each pair draw circles on the paper.  Then have them in turns draw faces with different emotions for their partners to guess.  At the end of the activity invite some students to show the rest of the class their pictures and say what the feeling words are (or get the others to guess).
  4. Teach the rest of the song vocab. Before class, print flashcards for the following vocab: sunny, rainy, lunchtime, eat, yummy, noisy, stormy, bedtime, sleep, good night. Hold up the first card, say the word and do the action (see Gestures section above) and have everyone chorus the word and copy your gesture. Then stick the flashcard on the board.  Do the same for all the flashcards and stick them on the board in the order of the song, in a line across the board. Once all the cards are on the board, point to any card and say “What’s this?”.  Elicit the word.  Keep pointing to flashcard randomly as the class shouts out the words, getting faster and faster.  Finally, ask individual students what different cards are.
  5. Play “Missing Flashcard Guess”. With the flashcards still on the board, tell everyone to close and cover their eyes.  Remove a card and hold it behind your back.  Tell everyone to open their eyes and shout out the missing flashcard.  Do this for the other cards at a quick pace.
  6. Match feelings to the situations. With the flashcards still on the board, ask the class how you feel when it’s sunny (e.g. ask “Do you feel angry when it’s sunny?” and do an angry face – hopefully everyone will respond “No! Happy”). Draw a happy face under the sunny flashcard.  For each card elicit the feeling (from the song) and draw the face under each card.
  7. Practice actions of the song. Now we have all of the vocab on the board.  Teach the actions for each word (see Gestures section above).  Next, point to each picture on the board and get everyone to do the action.
  8. Sing The Feelings Song. Play the song through once and have everyone look at the pictures on the board (point as the song plays) and do the actions.  Next, play the song again and sing along, encouraging everyone to sing as they do the actions.
  9. Do a “Feelings / Emotions” worksheet. To finish off this section of the lesson, give out worksheets which has the feelings vocab from the song.  As your students are doing the worksheets, ask questions (e.g. “How does he/she feel?”, etc.).  You can also give a worksheet for homework.

The Days of the Week Song

$
0
0

Download a new song from ESL KidStuff: The Days of the Week Song

Days of the Week SongThe Days of the Week Song

Song Theme: Saying the days of the week
Target Vocab: Monday, Tuesday, Wednesday, Thursday, Friday, Saturday, Sunday, What day is it today?
Song Length: 1:06

Our original song focusing on learning the days of the week. It’s a fun song to sing along to. Here is a sample:

(Members can log in to download the full song)


Lyrics:

Monday, Tuesday, Wednesday, Thursday, Friday, Saturday, Sunday.
What day is it today?

Monday, Tuesday, Wednesday, Thursday, Friday, Saturday, Sunday.
What day is it today?

Monday, Tuesday, Wednesday, Thursday, Friday, Saturday, Sunday.
What day is it today?


Gestures and activities to use with the “The Days of the Week Song”

Some simple actions can be used with this song:

  1. Stand up with both hands straight up in the air.
  2. As the song plays each of the day words (Monday, Tuesday, etc.) slowly lower both arms, stretching right out, getting lower on each beat of the day words. So, for “Monday” both arms will be straight up at 12 o’clock, “Tuesday” your arms will be at 5-to and 5-past, … “Thursday” at quarter-to and quarter-past and finally by “Sunday” both arms are pointing down to half-past.
  3. Then for the “What day is it today?” part, do the ‘palms of the hands up’ question gesture.

Days of the week song gestures


Using The Days of the Week Song in class

Teaching days of the week can be really fun and the song really helps the students to learn the words and remember the order of the days.

  1. Teach the days of the week vocab. Start off by looking at a calendar with everyone (and English one, if possible). Have some fun with the calendar first: ask students to point at days such as Christmas and to point out their birthdays.  Ask what day their birthdays are on this year and point to the days row at the top of each month. Start to teach / elicit the English words for the days as you discuss their birthdays. Ask what day it is today.
  2. Play “Put the days in order”. Before class, prepare some colored rectangles of card and write the days of the week in thick marker pen on each rectangle of card.  You’ll be putting students in pairs so make enough sets for each pair.  Also, if each day can be written on a different coloured card it will help the students to quickly identify each day. Put your students in pairs and give each pair a set of mixed up cards. By referring to the calendar, have the pairs put the days in order on the floor or table. Then get everyone to touch each card and repeat after you as you chorus the days of the week paying special attention to the fist letter of each word (e.g. “Th” for “Thursday”).  Run through a few times, getting faster and faster. Finally, get the pairs to mix up the cards and tell them they are going to race to see which pair can put their cards in order first.  Say “Ready, steady, go!” and let the students put the cards in order.  The winner pair finished first with the correct order.
  3. Play “Wall Touch”. Give each pair some Blue-Tak or something to stick the cards on the wall with.  Ask everyone to randomly stick the cards all over the walls around the room.  Then bring everyone into the middle of the room.  Shout out “Monday” and everyone has to race over to a Monday card and touch it.  Then “Tuesday” and so on (in the correct order) until you make it through all the week days.  Play another round, this time faster!
  4. Sing “The Days of the Week Song”. Put one set of day cards on the board in the correct order (or use our song poster). Run through the gestures (see above) first. Then play the song and sing along doing the gestures.  If this is the first time to sing the song, play it a second time.
  5. Do a “Days of the Week” worksheet. To finish off this section of the lesson, give out worksheets based on the days of the week. As your students are doing the worksheets, ask questions (e.g. “What day is it?”, etc.). You can also give a worksheet for homework. We have two good worksheets: Days of the Week Scramble 2 and Days of the Week Order.

Months March song

$
0
0

Download a new song from ESL KidStuff: Months March song

Months March SongMonths March song

Song Theme: Saying the months of the year
Target Vocab: January, February, March, April, May, June, July, August, September, October, November, December
Song Length: 1:26

Our original song focusing on learning the months of the year. It’s a marching song – everyone marches around to the song and follows the marching orders.  It’s great fun and a wondeful way to learn the months in their correct order. Here is a sample:

(Members can log in to download the full song)


Lyrics:

Ready … March!

January (January)
February (February)
March (March)
April (April)
May (May)
June (June)
July (July)
August (August)
September (September)
October (October)
November (November)
December (December)

Everybody … Stop!

Ready … March!

January, February, March,
April, May, June,
July, August, September, October,
November, December.

Everybody … Stop!


Gestures and activities to use with the “Months March” song

The actions are very simple for the song:


If you have a large room with plenty of space for everyone to march around:

  1. Get everyone to line up facing forwards.  Everyone must stand to attention like soldiers (chin up, chests out, perfectly straight and still)
  2. Start the music and get everyone to march in time to the music on the command “Ready … March!”.  Everyone needs to march in a perfect line, arms swinging up to the horizontal.
  3. The first verse of the song is a call / repeat style: the singer calls out the months and everyone repeats.  Have everyone marching up and down the classroom shouting out the months.
  4. On the command “Everybody … Stop!” everyone stops and stands to attention, perfectly still.  Then start marching again on “Ready … March!”.
  5. This time there is no repeating.  Students have to remember the months and shout them out as they march.


If you only have a small room or don’t have much space:

Follow the same steps as above but get everyone to march on the spot.


Using the Months March song in class

Learning all the months in their correct order is not the easiest task, but using the song regularly helps a lot!  The first time you use the song, follow these steps for teaching the months:

  1. Teach the months of the year vocab. Start off by looking at a calendar with everyone (and English one, if possible). Have some fun with the calendar first: ask students to point at days such as Christmas and to point out their birthdays. Ask what month their birthdays are in and point to the month word (e.g. January) at the top of each month. Start to teach / elicit the English words for months as you discuss their birthdays. Ask what month it is now as well as the following (using the calendar):

    - the month Christmas is in
    - months other holidays are in (e.g. Easter, famous national holidays – this depends on the country you are teaching in!)
    - months for different seasons (e.g. summer months, winter, spring and fall / autumn)

  2. Play “Put the days in order”. Before class, prepare some colored rectangles of card and write the months of the year in thick marker pen on each rectangle of card. You’ll be putting students in pairs so make enough sets for each pair. Also, if each month can be written on a different coloured card it will help the students to quickly identify each month. Put your students in pairs and give each pair a set of mixed up cards. By referring to the calendar, have the pairs put the months in order on the floor or table. Then get everyone to touch each card and repeat after you as you chorus the months of the year paying special attention to the fist letter of each word (e.g. “J” for “January”). Run through a few times, getting faster and faster. Finally, get the pairs to mix up the cards and tell them they are going to race to see which pair can put their cards in order first. Say “Ready, steady, go!” and let the students put the cards in order. The winner pair finished first with the correct order.
  3. Play “Wall Touch”. Give each pair some Blue-Tak or something to stick the cards on the wall with. Ask everyone to randomly stick the cards all over the walls around the room. Then bring everyone into the middle of the room. Shout out “January” and everyone has to race over to a January card and touch it. Then “February” and so on (in the correct order) until you make it through all the months. Play another round, this time faster!
  4. Sing the “Months March” song. Put one set of months cards on the board in the correct order (or use our song poster). Get everyone to stand to attention, like soldiers, and then follow the steps in the “Gestures and activities” section above. If this is the first time to sing the song, play it a second time and let everyone enjoy marching around.
  5. Do a “Months of the Year” worksheet. To finish off this section of the lesson, give out worksheets based on the months of the year. As your students are doing the worksheets, ask questions (e.g. “What month is it?”, etc.). You can also give a worksheet for homework. We have two good worksheets: Months Scramble and Months Order.

How Did You Get Here Today? song

$
0
0

Download a new song from ESL KidStuff: How Did You Get Here Today?

How did you get here today? songHow Did You Get Here Today? song

Song Theme: Saying how you travelled and using transport vocab with correct prepositions.
Target Vocab: How did you get here today?, I got here on/by, foot, bus, bicycle, car, train, boat, airplane, rocket.
Song Length: 1:21

Our original song focusing on transport. It’s a nice song to work on the question “How did you get …?” and practices different answers using different kinds of transport. It ends with a fun countdown and blast off of a rocket! There are also sound effects for each transport vocab during the song.  Here is a sample:

(Members can log in to download the full song)


Lyrics:

How did you get here today?

Verse 1:

I got here on foot
I got here by bus
I got here by bicycle
I got here by car.

How did you get here today?

Verse 2:

I got here by train
I got here by boat
I got here by airplane
I got here by rocket.

Wow!

10 – 9 – 8 – 7 – 6 – 5 – 4 – 3 – 2 – 1
Blast off!


Gestures and activities to use with the “How Did You Get Here Today?” song

Some simple actions can be used with this song:

  1. Do you question pose (palms up, puzzled look on face) for the question “How did you get here today?”, but point downwards (to the ground) for the “here” part.
  2. As the song plays do the following actions:
  • on foot: walk on the spot.
  • by bus: pretend to drive a bus and beep the horn.
  • by bicycle: pretend to be cycling and ringing a bell.
  • by car: pretend to drive a car and beep the horn.
  • by train: do the train gesture – moving your hands around like a wheel and “chu-chu”ing.
  • by boat: do wave motions with your hands.
  • by airplane: prentend to be an airplane by holding your arms right out.
  • by rocket: put your arms above your head, finger tips touching to make a rocket shape.  Keep this shape for the countdown and then jump for the blast off.


Using the “How Did You Get Here Today?” song in class

This is a nice lesson which not only teaches transportation vocabulary but also how to ask and reply to a question on how they arrived at their school.

  1. Play vocab flashcard treasure hunt. Before class, prepare flashcards of the vocab from the song (walk, bus, bicycle, car, train, boat, airplane, rocket – you can get “walk” on our actions flashcards page and the others on our transport flashcards page) and hide them around the classroom – behind a chair, on the window sill, in a book, etc.  In class, sit your students down and start hunting around the room, gesturing that you are looking for something.  “Find” one of the flashcards and look relieved and happy to have found it. Indicate that there are 7 more flashcards to find and get everyone to hunt around the room helping you to look for the flashcards.  Once all of the flashcards have been found sit everyone down again.
  2. Teach vocab. On the board, draw a simple picture of your school at one end of the board and your home (a simple house) at the other.  Alternatively, you can use photos of both.  Tell your students what each place is (“This is our school – here!”,  “This is my house.  I live here!” (maybe draw a picture of yourself above the house)). You are going to teach the vocab in order of the song.  Pull out the first card (“walk”).  Put the card on the board between the school and your house.  Say slowly “I got here on footon footon foot.”, whilst doing the song gesture of walking on the spot.  Get all of your students to stand up and walk on the spot as they say “on foot .. on foot …”. Next pull out the bus flashcard and replace the walk flashcard with it on the board.  This time say “I get here by busby busby bus” whilst doing the song gesture of driving a bus and beeping the horn. Get all of your students to stand up and pretend to drive a bus and beep the horn as they say “by bus … by bus …”.  Continue doing this for all of the cards and actions of the songs.  For the last one – “rocket” – get everyone to count down from 10 to 1 and then jump as they blast off!
  3. Play “Vocab Art Gallery”. If you have just a few students, draw some squares on the board in a row for each student to draw in (these are their picture frames).  You’ll need one square (or picture frame) per student.  Make sure the squares are at a good height so everyone can reach.  If you have a lot of students, give each student a piece of paper and have them draw 8 boxes (picture frames) on the paper.  Tell everyone they are going to draw some pictures.  For smaller classes have your students stand in front of one of the squares on the board.  Say “Draw … I got here … by boat“).  Everyone should draw a picture of a boat in their square (or the first square of the sheet of paper for students in larger classes). Give a minute for this (you can use an egg timer for fun!).  When time is up say “STOP!”. Now, you are the judge.  Walk around looking at the pictures and give some comments (“hmmm, not bad” … “oh, very nice!”, etc.).  Finally, award a winner for the best drawing and get everyone to clap.  Now, erase the pictures on the board (or if using paper move onto the second square) and go onto the next vocab item (e.g. by bike).  Again, judge the pictures and select a winner.  Go through all of the pictures, each time electing a different winner – try and make sure everyone wins at least once.  If you have more than 8 students you can choose joint winners.
  4. Sing the “How Did You Get Here Today” song. Put the flashcards on the board in order of the song (or use our song poster). Run through the gestures (see above) first. Then play the song and sing along doing the gestures. If this is the first time to sing the song, play it a second time.
  5. Practice Asking and Answering “How did you get here today” with a class survey. Before class, print our our How Did You Get Here Today Survey. Draw enough columns for each student in the class and write their names at the top.  Then copy enough for all of your students.  Start by modelling – hold up your survey and point out the names at the top.  Choose one student and ask “How did you get here today?”.  Elicit a full answer (E.g. “I got here by bus”) and show everyone how to fill in the survey (by drawing a circle in the correct cell). Do with a few students until everyone understands.  If someone gives an impossible answer (e.g. rocket), show an expression of shock and then say, “Noooo, that can’t be right!” and have a laugh, but try to elicit their true answer.  Then, give out a survey to everyone.  First, get everyone to find their own name and circle their answer.  Then get everyone to mingle about asking and answering and filling in their surveys. When everyone has finished, complete your survey sheet by asking the class for the answers (e.g. “How did Naomi get here today?”).
  6. Set Homework: “How did you get to school today?” worksheet. To finish off this section of the lesson, give out a worksheet for homework. We have a good worksheet which relates perfectly with this lesson: How did you get to school today? worksheet.

Mr. Shape Head

$
0
0

Download a new song from ESL KidStuff: Mr. Shape Head

Mr Shape HeadMr. Shape Head song

Song Theme: Saying different shapes and face vocab.
Target Vocab: square, circle, triangle, rectangle, head, eyes, ears, nose, mouth, hair.
Song Length: 1:44

Our original song focusing on shapes. The song is centred around a character called Mr. Shape Head, who has shapes as facial features.  It’s a really fun song – kids find the song and character to be really funny. The song integrates well into a shapes themed lesson as it has some really great Mr. Head themed activities and crafts.

(Members can log in to download the full song)


Lyrics:

Chorus:

Mr. Shape Head, how are you?
How are you this morning?

Verse 1:

My eyes are square, but I’m okay
My ears are circles, but I’m okay
My nose is a triangle, but I’m okay
For I am Mr. Shape Head

Chorus

Verse 2:

My head is square, but I’m okay
My mouth is a rectangle, but I’m okay
My hair is a triangle, but I’m okay
For I am Mr. Shape Head

Chorus


Gestures and activities to use with the “Mr Shape Song” song

Some simple actions can be used with this song:

  1. For the Chorus, touch your head for the “Mr. Shape Head” parts and then do the question gesture (palms up, looking puzzled) for the “How are you?” parts.
  2. For the verses, make shapes with your fingers for each shape and place on the part of the face as it is sung (e.g. “My eyes are square” – make two square shapes with your fingers and place over your eyes; for “My ears are circles” make two circle shapes with your fingers and place over your ears; etc.).
  3. For the part of the verse “but I’m okay”, do a thumbs up with both hands.
  4. For the end of each verse “For I am Mr. Shape Head”, move your already thumbs up gesture to point your thumbs inwards to your body.


Using the “Mr. Shape Head” song in class

This is a really fun, interactive lesson for learning shapes and it has some great activities.  If possible, teach this song after you have taught the parts of the body lesson (as you will be recycling vocab from that lesson).

  1. Teach the shapes vocab. Before class, prepare the shapes from our shape craft sheet here: color version | black & white version. Cut our the shapes from the sheet for yourself and also enough for each pair of students (these will be used in a pair work activity later on).  It would be a good idea to print on card or even laminate the shapes so you can reuse them.  Start off by showing the large square and teaching / chorusing “square”. Hand the square to a student who says “square” and passes it on to another, each student saying “square” as they pass it around.  Do this for all the shapes.  You can also elicit colors and sizes (e.g. a “big, yellow, square”, “a small, blue square”, etc.).
  2. Play missing shapes. Spread the shapes out on the floor and gather everyone around.  Tell everyone to close their eyes.  Take away one shape and say “Open your eyes”.  Everyone must guess which shape is missing.
  3. Play shape touch. With the shapes still spread out on the floor, say “Hands up in the air” – once all hands are up say “touch a (green) circle” – and have everyone quickly touch (not slam!) a green circle. Do this for all of the shapes.
  4. Do “Play-doh” shapes. Put kids in small groups and give each group some pots of play-doh.  Have some play-doh for yourself.  Everyone is going to make play-doh shapes.  Start with a shape and model how to make it with the play-doh and have everyone make the shape.  Do this for all four shapes.
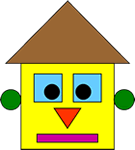
  5. Show the Mr. Shape Face craft. Everyone will be unaware that the cut-out shapes actually make up a face picture.  Bring everyone’s attention to the board.  Make sure each of your shapes has some sticky plastic or blue-tak on the back.  Hold up the large square and elicit the shape.  Stick it to the board.  Then hold up the large triangle, elicit that shape and stick it to the nose position. Keep doing this with all of the shapes until you have a complete head.  Everyone will enjoy watching a face grow out of the shapes they have been playing with. Elicit / teach the face vocab for each face shape (e.g. a triangle nose, a rectangle mouth, etc.).
  6. Play “teacher says” for face vocab. With the shapes still on the board, get everyone to stand up and say “Teacher says touch your (nose)”.  Everyone should touch their nose.  Do this for all of the face vocab.  Then say “Touch your hair” without the “Teacher says” part and indicate that they shouldn’t touch when “Teacher says” is omitted.  As everyone gets the hang of it go faster and faster.
  7. Sing the “Mr. Shape Head” song. Keep Mr. Shape Head on the board and use it with the song.  The song poster is also helpful as it shows the order of the shapes as they are sung in the song – so you can put this on the board as well. Play the song through one time, pointing at the shapes on the board as they are sung.  Next, get everyone to stand up – teach the gestures (see above) and then play the song again and sing along doing all of the gestures.
  8. Do the Mr. Shape Head craft. Put students in pairs and give each pair the shapes.  Together they can make Mr. Shape Head.  Circulate as everyone is doing the activity and ask questions (e.g. “What is this shape?”, “What is this?”).  You can play the Mr. Shape Head song in the background as everyone is doing this activity.

    Extension activity – an optional, fun game is to play a version of “Pin the tail to the donkey”. Blindfold one student and give him a shape to put on the yellow square.  Then get another blindfolded student to add another shape.  Keep going until all the shapes are used up.  The final head will be all over the place but it will have been great fun!

  9. Set Homework: “Mr. Shape Head 2″ worksheet. To finish off this section of the lesson, give out the worksheet for homework.

Let’s Go to the Zoo

$
0
0

Download a new song from ESL KidStuff: Let’s Go to the Zoo

Let's Go to the ZooLet’s Go to the Zoo song

Song Theme: Saying different zoo animals and their noises.
Target Vocab: zoo, Let’s go to, What will we see, lion, elephant, monkey, tiger, snake, birds.
Song Length: 1:22

Our original song about going to the zoo and seeing lots of animals.  The song also practices structure “Let’s go to …” and “We will see …” as well as the question “What will we see …?”.

(Members can log in to download the full song)


Lyrics:

Chorus:

Zoo, zoo,
Let’s go to the zoo,
What will we see at the zoo?

Zoo, zoo,
Let’s go to the zoo,
What will we see at the zoo?

Verse 1:

Lion, we will see a lion,
Elephant, we will see an elephant,
Monkey, we will see a monkey,
Let’s go to the zoo!

Chorus

Verse 2:

Tiger, we will see a tiger,
Snake, we will see a snake,
Birds, we will see some birds,
Let’s go to the zoo!


Gestures and activities to use with the “Let’s Go to the Zoo” song

The gestures are fun and mimic the animals being sung about:

  1. For the “Zoo, zoo, Let’s to to the zoo”, have everyone walking on the spot as they walk to the zoo.
  2. For the next line “What will we see at the zoo?”, have everyone put their hand above their eyes as they search for animals.
  3. For the animal parts do the following:
  • lion: look fierce and roar
  • elephant: make a trunk with your arm and make the trumpet noise
  • monkey: do the money scratching head and armpit gesture whilst saying “oh-oh”
  • tiger: look fierce and roar
  • snake: make a snake shape with your hands and hiss like a snake
  • birds: flap your arms like wings and say “tweet-tweet”


Using the “Let’s Go to the Zoo” song in class

The song is perfect for teaching zoo animals and also as a follow up it is useful for teaching the structure “Let’s go to …”.

  1. Teach the zoo animals vocab. If you have plastic toys for the animals you can use them or you can use zoo animal flashcards.  Before the class put the toys or flashcards in a bag. Bring out the bag and peer in – make surprised noises to get the full attention of your students. Slowly, inch by inch, pull out the animals – elicit /teach/chorus the animal name “e.g. What’s this? It’s a (lion). (Lion), (Lion), (Lion)”. Then teach/chorus the animal noise (E.g. “What noise does a lion make?” “Roar!”).
  2. Play “Pass the animals”. Pass one of the animals or animal flashcards to the nearest student. As you pass, say “(lion) (roar)”. Have the students pass all the animals around the circle, all the while saying the animal name and noise.
  3. Play “Animals Match-up Concentration”. You’ll need two sets of zoo animals flashcards. Shuffle them and spread, face-down, on the floor or table. Turn over one card and then another.  The object of the game is to find the same two cards – which wins you a point.  If you turn over the same pair of cards (e.g. two tigers) you keep the cards and remove them from the game.  If you turn over two different cards, turn them back over.  The game ends when all cards have been removed and the player with the most cards is the winner.
  4. Sing the “Let’s Go to the Zoo” song. Before the song, run through the actions in the correct order of the song.  It will help to have the flashcards in order on the board or use our song sheet.  Play the song and have everyone doing the actions as they sing along.
  5. Play “Animals Walk” game. Have everybody stand at one end of the classroom. First model: hold up a flashcard of a lion. Shout “Run like a lion!” – then get down and crawl across the room like a lion all the time roaring. Then have everyone do it. Then do for all the other animals (e.g. “Stomp like an elephant!”, etc.).
  6. Do “Zoo Animals Play-doh”.  You’ll need different colored play-doh.  Sit down the students in groups and show them how to make simple models of animals.  Let everyone make the animals that want and as they are doing so circulate and ask lots of questions (e.g. What’s that?  Is is a lion?  What noise does a lion make? etc.).
  7. Do “Zoo Animals” worksheet. Use the Animals 3 worksheet. First hold the worksheet up for all to see. Take a crayon and elicit its color (e.g. “What color is this?”). Then color one of the animals whilst eliciting its name. Do the same for the other animals. Give out the worksheets and have the students color the animals, all the time praising, helping, encouraging and asking target questions (e.g. “What is it?”). Finally, go to each S in turn, look at his/her worksheet, ask some questions and then give back with lots of praise.
  8. Set Homework: “At the Zoo” worksheet. To finish off this section of the lesson, give out the worksheet for homework.

Where are my Things?

$
0
0

Download a new song from ESL KidStuff: Where are my Things?

Where are my Things songWhere are my Things?

Song Theme: Saying prepositions of location and furniture
Target Vocab: on, under, in, behind, next to, in front of, between, pen, shoes, table, desk, drawer, curtains, TV, door, sofa, chair, feet, Where is/are ~, is it / are they ~, it’s / they’re ~
Song Length: 1:11

Our original song using prepositions of location. The song also practices structures “Where is / are ~”, It’s / They’re ~”, “Is it / Are they ~”.

(Members can log in to download the full song)


Lyrics:

It’s time to go to school but where are my things?

Verse 1:

Where are my things? Where are my things?
Where are my things? Where can they be?

 
Where is my pen? Where is my pen?
 
Is it on the table?
No!
Is it under the desk?
No!
Is it in the drawer?
No!
Where is it?
It’s behind the curtains!

Verse 2:

Where are my things? Where are my things?
Where are my things? Where can they be?

 
Where are my shoes? Where are my shoes?
 
Are they next to the TV?
No!
Are they in front of the door?
No!
Are they between the sofa and the chair?
No!
Where are they?
They’re on your feet!


Gestures and activities to use with the “Where are my Things?” song

There are no specific gestures for this song.  The song can be used with our worksheet for listening practice – students listen to the song and draw the answers on the worksheet.


Using the “Where are my Things?” song in class

The song is great for an active listening exercise!

  1. Teach the prepositions vocab. For this you’ll need a box and a small toy animal (I use a koala).  Before class, put the koala inside the box.  In class, site your students down and take out the box.  Rattle the box and have your students rattle the box and try to guess what is inside.  Take out the toy and introduce it to the class.  Also elicit the work “box”.  Sit the toy on the box and ask “Where is it?”.  Elicit/Teach the preposition “on” and then “It’s on the box”.  Do the same for the rest of the prepositions (on, under, in, behind, next to, in front of, between)
  2. Practice the prepositions. Put students in pairs and give each pair a box and toy.  Have each pair ask and answer questions using the preposition.
  3. Play “Where Is / Where Are”. Take out a pen and elicit the word. Have everyone close their eyes.  Hide the pen somewhere in the classroom (e.g. inside a book).  Tell everyone to open their eyes and ask them “Where is the pen?”.  Have each student guess using the structure “Is it (under) the (chair)?”.  When the pen is finally found take out a pair of shoes (can be a dolls pair).  Elicit / Teach “They’re shoes” and show the contrast between “It’s” and “They’re”. Again, have your students close their eyes as you hide the shoes.  Students try and guess their location by asking questions such as “Are they (behind) the (desk)?”.

    Now put students in pairs and have each pair hide objects and ask where things are using the prepositions and structures.

  4. Play “Where are my Things” song with listening worksheet. Give everyone a worksheet (Worksheet 1 for “Where are my Things?” song).  Elicit the items on the worksheet.  Tell the students to listen to the song and draw the pen and shoes in the correct location on the worksheet.  Play the song twice to give everyone a good chance of getting the answer right.

    If everyone enjoyed the song you can play it again and sing along.  Put the song poster on the board to use as you all sing along.

  5. Do the Prepositions Listening worksheet. Give everyone a worksheet (Worksheet 2 for “Where are my Things?” song). This time the teacher is going to make sentences and the students have to listen and draw the objects in the right places.
  6. Play “Prepositions Pictionary”. For smaller classes you can play this on the board – larger classes can use paper to play in groups. Start by modelling the activity.  Bring a student up to the class.  Say “Draw a cat on a car”.  The student has to draw the picture.  Then get the student who drew the picture to say a new sentence and another student to draw the picture.  Keep playing so that everyone has a chance to draw and say a sentence.
  7. Set Homework: To finish off this section of the lesson, give out any of the worksheets for homework from our Prepositions of Location Worksheets page.

The Morning Routines Song

$
0
0

Download a new song from ESL KidStuff: The Morning Routines Song

Morning Routines SongThe Morning Routines Song

Song Theme: Saying morning routine verbs
Target Vocab: Good morning, wake up, get up, wash my face, brush my hair, get dressed, eat breakfast, brush my teeth, put on my shoes, go to school.
Song Length: 1:19

Our original song describing our morning routines.

(Members can log in to download the full song)

There is also a video to go with the song:


Lyrics:

Chorus:

Good morning! Good Morning!
It’s time to wake up.
Good morning! Good Morning!
I have to get up.

Verse 1:

I wash my face (wash, wash, wash),
I brush my hair (brush, brush, brush),
I get dressed (dressed, dressed, dressed),
There’s such a lot to do!

Chorus:

Good morning! Good Morning!
It’s time to wake up.
Good morning! Good Morning!
I have to get up.

Verse 2:

I eat my breakfast (eat, eat, eat),
I brush my teeth (brush, brush, brush),
I put on my shoes (put on, put on),
There’s such a lot to do!

 
It’s time to go to school.


Gestures and activities to use with “The Morning Routines Song”

As you sing the song, follow these actions:

  • “Good morning! Good Morning!” – stretch your arms up (as if just waking up)
  • “It’s time to wake up” – point at imaginary wrist watch for “It’s time to” and open your hands in front of your eyes for “wake up” (to gesture opening your eyes)
  • “I have to get up” – do an energetic star jump on “get up”.
  • “I wash my face (wash, wash, wash)” – gesture washing your face
  • “I brush my hair (brush, brush, brush)” – gesture brushing your hair
  • “I get dressed (dressed, dressed, dressed)” – gesture getting dressed
  • “There’s such a lot to do!” – gesture wiping your forehead and looking tired out
  • “I eat my breakfast (eat, eat, eat)” – gesture eating breakfast
  • “I brush my teeth (brush, brush, brush)” – gesture brushing your teeth
  • “I put on my shoes (put on, put on)” – gesture putting on your shoes
  • “It’s time to go to school.” – point at imaginary wrist watch for “It’s time to” and wave goodbye for “go to school”.


Using “The Morning Routines Song” in class

The song is great fun with loads of easy gestures.  It helps make teaching morning routine verbs fun.

  1. Teach the morning routines verbs. Start with a guessing game. Before class print out the flashcards for morning routines.  Start with an easy one – “brush my teeth” – look at the card but don’t show it to anyone.  Do the action for brushing your teeth and ask “What am I doing?”.  It’s ok if the students answer in their first language – whoever answers first is the winner.  Try and elicit the English or if not, teach “brush my teeth”.  For the next card, the winner can look at the card and do the action.  Again, elicit / teach the English.  Continue until all the cards / actions have been guessed.
  2. Practice the morning routines verbs. Put the cards randomly on the board (stick on with blue-tak or tape) and draw a circle around each card.  Start by chorusing each card quickly (T: “wake up”, Ss: “Wake up”).  Go through chorusing all the cards at least three times, getting quicker and quicker as you go.  Next, point to a card and say “What’s this?”.  Get everyone to say the card together.  Point to each card and get the class to shout out the verbs together as you touch each card. Finally, remove one card from the board – the circle it was in will still be there.  Point to the empty circle and again say “What’s this?” – get everyone to shout out together the missing card.  Point to other cards and elicit them, slowly removing all the cards from the board leaving just their circles.  See if everyone can remember the words without any cards being there!
  3. Play “Flashcard touch” on the board. Put the cards back on the board, at a height that everyone can reach.  Model the game first – select a student and say “Touch put on my shoes”.  The student should go to the board and touch the correct card.  Then get the student to do the same for you.  When everyone has got the idea put them in pairs and get each pair to stand at the other end of the room.  In pairs, each student says a verb phrase as their partner runs to the board and touches the right card.
  4. Do “Morning Routines” Drawings. Give out a large sheet of paper (e.g. A3) to each student and model the activity.  Draw things you do in the morning (e.g. brush your teeth, eat toast, watch TV) – it doesn’t have to be just the activities from the flashcards / song, anything that you do is good.  Then encourage each student to draw what they do.  As they are drawing, go around the class asking questions (e.g. What’s this?  Do you really eat chocolate for breakfast, etc.?).  At the end, get everyone to stick their sheet of paper on the classroom walls. Pair up students and get them to try and guess what the pictures are.
  5. Sing “The Morning Routines” song. Put the morning routine flashcards up on the board in the order of the song, or alternatively, use our song poster. Get everyone to stand up and teach the actions and gestures for the song (see Gestures and activities to use with “The Morning Routines Song” above).  Then play the song and get everyone to sing and do the actions along with you.  Play twice so everyone gets the hang of it.
  6. Do the “My Morning 1″ worksheet. Give out the My Morning 1 worksheet to each student. Model the worksheet and then have everyone work on the sentences.  As everyone is working on their worksheets go around the class and ask questions (e.g. What does that say?  Do you take a showing in the morning?).
  7. Play charades. To finish the class, get together the morning routines flashcards and also any other action verb flashcards you have used in previous lessons.  Divide the class into 2 teams.  One student comes to the front of the class and acts out the flashcard you show to him/her.  The first person to shout out the correct answer wins a point for his/her team.
  8. Set Homework: To finish off this section of the lesson, give out the My Morning 2 worksheets for homework.

If You’re Happy & You Know It

$
0
0

Download a new song from ESL KidStuff: If You’re Happy & You Know It

If you’re happy and you know itIf You’re Happy & You Know It

Song Theme: Saying action verbs
Target Vocab: happy, clap your hands, stomp your feet, say “We are”, do all three.
Song Length: 1:22

The classic song which is great as an energy burner and good fun for all kids.

(Members can log in to download the full song)

Lyrics:

Verse 1:

If you’re happy and you know it, clap your hands.
If you’re happy and you know it
And you really want to show it.
If you’re happy and you know it, clap your hands.

Verse 2:

If you’re happy and you know it, stomp your feet.
If you’re happy and you know it
And you really want to show it.
If you’re happy and you know it, stomp your feet.

Verse 3:

If you’re happy and you know it, say “We are!”
If you’re happy and you know it
And you really want to show it
If you’re happy and you know it, say “We are!”

Verse 4:

If you’re happy and you know it, do all three.
If you’re happy and you know it
And you really want to show it
If you’re happy and you know it, do all three.


Gestures and activities to use with “If You’re Happy & You Know It”

The actions are very simple: as you sing march on the spot and do the actions from the song (clap your hands, stomp your feet, say “We are”, do all three).


Using “If You’re Happy & You Know It” in class

This song can be used with the lesson theme of emotions & feelings (for the word “happy”) or when teaching action verbs.  However, we like to use it as a fun, quick activity in the following situations:

  • At the beginning of the lesson as a fun warm up.
  • At the end of the lesson to end the class on a fun high note.
  • As an energy burner: if your kids have far too much energy and you are having a bit of trouble controlling them, running through this song a couple of times will help to burn off some of that extra energy.
  • As a wake-me-up: if your kids are getting a bit lethargic and need a boost, get everyone up, singing and marching along to this song.  It will wake them right up!
  • As a reward: kids just love this song!  Encourage everyone to do well in an activity by promising them that they can sing this song afterwards if they do a good job.
  • As a request: sometimes it’s nice to ask your students what they would like to do next.  I will often give some options (e.g. play a particular game, read a story, sing a song, etc.) including this song.

New Song: The Directions Song

$
0
0

Download a new song from ESL KidStuff: The Directions Song

The Directions SongThe Directions Song

Song Theme: Saying action verbs and directions: left, right, forward, back
Target Vocab: left, right, forward, back, jump, turn around, touch the ground, turn, sit down, stand up, clap your hands
Song Length: 1:23

A really high energy song which practices directions and action verbs.

(Members can log in to download the full song)

Lyrics:

Are you ready?

Chorus:

Jump to the left,
Jump to the right,
Jump forward,
And jump back.

Jump to the left,
Jump to the right,
Jump forward,
And jump back.

Verse 1:

Turn around and touch the ground,
Turn to the left and turn to the right.
Turn around and touch the ground,
Turn to the left and turn to the right.

Chorus

Verse 2:

Sit down and stand up,
Jump up and down and clap your hands.
Sit down and stand up,
Jump up and down and clap your hands.


Gestures and activities to use with “The Directions Song”

The actions are very simple: as you sing along do the actions of the song.


Using “The Directions Song” in class

This is a great song for burning up energy so it can be used as a warm up, energy burner or even to wake everyone up. There is some useful vocab centred around the directions left, right, forwards, back.  This is very much an action-based lesson focusing on the verbs in the song.  You’ll need two lengths of rope for this lesson.

  1. Teach left / right. Get a long length of rope and lay it on the floor from the front of the classroom to the back.  Stand at the font and to one side of the rope and get everyone to line up behind you, facing forward.  Shout “Jump to the left” and jump left over the rope.  Get everyone to follow you.  The do the same for the right: “Jump to the right”.  Do this a few times getting everyone to copy you and shout out “Jump to the left / right”.  Next, the teacher can leave the line and shout out for the rest of the class to jump left / right over the rope.  To make it into a game, sometimes shout out for the side of the rope everyone is already on – in this case everyone must jump but stay on the correct side of the rope.
  2. Teach forward / back. Now move the rope so it goes across the classroom, left to right.  Stand behind the rope with everyone in line with you.  Shout “Jump forward” and jump over the rope, with everyone copying you.  Next, shout “Jump back”.  Continue in the same way as with point 1 above.
  3. Practice left / right / forward / back. Put a second length of rope from the front to the back of the classroom, so with the two ropes it forms a large “+” in the room.  Get everyone to start front, left.  Shout out instructions (e.g.” Jump to the right”, “Jump back”, etc.) so that everyone jumps over the ropes.  Start off slowly and then get faster and faster.
  4. Left / right / forward / back pair activity. Put the students into pairs.  If you have hula-hoops use can use them but if not they aren’t necessary.  Demonstrate to the class with one student.  Tell the student to stand in the hula-hoop (or just in some space). Say to the student “Jump forward” and the student must do that.  Then Say another action (e.g. “Jump to the right”).  Continue giving instructions so the student jumps around the space in the hula-hoop (or just in the space in the room).  Now, get your pairs to do the activity, with one student shouting out instructions to his/her partner.  After a while, get the pairs to change.
  5. Practice the verbs of the song. Stand everyone in front of you.  Say the first verb and do the action (e.g. “turn around”).  Get everyone to follow you.  Continue through all of the verbs and repeat a few times so that everyone knows the actions.  You can also put the song sheet on the board so everyone can see the actions.
  6. Sing “The Directions Song”. Now that everyone has got the idea of the actions for the song they should be ready.  The song is pretty fast so make sure everyone is ready.  The teacher should also do the actions of the song and sing along so to encourage everyone to follow.  Play the song through the first time and just focus on getting the actions right.  After that play the song a couple more times and encourage everyone to sing as well.  You can play this song each week – it will become a class favorite!
  7. Set Homework: For homework, give out the Left Right Color worksheets.


What Time Is It? song

$
0
0

Download a new song from ESL KidStuff: What Time Is It?

What Time Is It?What Time Is It?

Song Theme: Saying and asking for the time
Target Vocab: What time is it?, Please could you tell me the time?, It’s _ o’clock
Song Length: 1:09

A simple song which helps to practice the structures for telling the time.

(Members can log in to download the full song)

Lyrics:

Tick-tock-tick-tock
Tick-tock-tick-tock

Chorus:

What time is it?
What time is it?
Please could you tell me the time?

Verse 1:

It’s one o’clock
It’s two o’clock
It’s three o’clock
It’s four o’clock
It’s five o’clock
It’s six o’clock

Tick-tock-tick-tock
Tick-tock-tick-tock

Chorus

Verse 2:

It’s seven o’clock
It’s eight o’clock
It’s nine o’clock
It’s ten o’clock
It’s eleven o’clock
It’s twelve o’clock

Tick-tock-tick-tock
Tick-tock-tick-tock


Gestures and activities to use with the “What Time Is It?” song

For this song your students are going to be human clocks, using their arms to show the time.  Have everybody stand up with plenty of room to move their arms around without hitting anyone.

  1. For the question words sing along and hold your hands out, palms up, in the question gesture.
  2. For the times, hold your arms straight out in the time position.  So, for 1 o’clock, hold one arm straight up towards 12 and the other arm towards one.  As the song continues, one arm will move around the clock counting off each hour.


Using the “What Time Is It?” song in class

This is a really good song for introducing your students to telling the time as it contains key vocab and structures.  The gestures are easy and fun – your students will enjoy swinging their arms around with the times in the song.

  1. Introduce a clock and review numbers 1 to 12. Start the lesson by bringing in a clock or alternatively make a craft clock using our clock shape craft sheet. Elicit and chorus the word “clock”.  Then point to number 1 and elicit the number.  Point to each number 1-12 in order and elicit the numbers (you can move the hour hand around as you do this).
  2. Practice recognizing numbers 1-12. Before class prepare twelve A4 sheets of paper with a number (1-12) written on each piece.  Place the numbers randomly around the walls of the classroom at a height where your student can reach them.  In class, draw your students’ attention to the numbers and say “Point to number 1″.  Everyone should point.  Then go through all the numbers 1-12.
  3. Play “Touch the numbers on the wall”. Get everyone standing in the middle of the classroom.  Shout “Touch Number 7!”.  Everyone should run and touch that number – it will be a mad scramble but good fun!  Then go through the rest of the numbers.
  4. Write the numbers on the board. Along the top of the board write the numbers in order 1-12. Divide the class into 4 teams and get each team to elect a representative to write on the board.  Have the 4 students come to the board and tell them they are going to race to write the numbers 1-12.  The winner will win a point for their team.  Say “Ready – Steady – Go!” and the 4 students race to write the numbers.  Then get another 4 students to have a go.  At the end the team with the most points is the winner.
  5. Teach the time vocab. Hold up your clock and set a time (e.g. 4 o’clock).  Ask the class “What time is it?”.  Elicit / teach “It’s 4 o’clock”.  Move the hand to another time, and ask again (you can also ask “Please could you tell me the time?”).  Go through the hours eliciting the times from the class until they have got the hang of the structures.
  6. Practice the gestures of the song. Stand everyone in front of you. Say “Point you hands at 1 o’clock” and demonstrate how to do this (hold one arm straight up at 12 and the other at 1).  Then say “Point you hands at 2 o’clock” … continue all the way round to 12 o’clock.
  7. Sing the “What Time Is It?” song. Now that everyone has got the idea of the actions for the song they should be ready. The teacher should also do the actions of the song and sing along so to encourage everyone to follow. Play the song through the first time and just focus on getting the actions right. After that play the song a couple more times and encourage everyone to sing as well.
  8. Do the Clock Craft Sheet.  Before class print out the clock shape craft sheet – enough so that each student has one. You can either cut out the shapes before class or have your students cut out the shapes in class. You will also need fasteners for each clock to fasten the arms to the clock.  After constructing the clocks, put students in pairs.  First model the activity with a student.  Student A sets a time on his/her clock and asks “What time is it?” or “Please could you tell me the time?”.  Their partner answers.  Each pair takes it in turn to ask each other.
  9. Play “What time do you?”. Still using the clocks, your students are going to show you the time they usually do things.  Ask the class questions, such as “What time do you usually wake up?” (if they are not sure you can use gestures to show what you mean). As you ask the questions, everyone should move the hands on their clock to the time they do these activities.  Then select some students to orally tell you their time (e.g. “I wake up at 7 o’clock”). We are only concentrating on “o’clock” for this lesson, so if students have times on their clock such as 7.20 you can teach “About 7 o’clock”.

    Other routine questions you can ask the time for could be: eat breakfast / lunch / dinner, go to bed, go to school, leave school, take a bath, do homework, brush teeth, etc.

  10. Set Homework: For homework, give out the “What time is it? It’s __ o’clock” worksheet.


The Wheels on the Bus

$
0
0

Download a new song from ESL KidStuff: The Wheels on the Bus

Wheels on the BusThe Wheels of the Bus

Song Theme: Talking about travelling on the bus
Target Vocab: bus, wheels, go round, town, wipers, go swish, horn, goes beep, doors, open, shut, babies, go boo-hoo, driver, sit down.
Song Length: 1:58

A fun song with great vocab.

(Members can log in to download the full song)

Lyrics:

Verse 1:
The wheels on the bus
Go round and round
Round and round
Round and round.
The wheels on the bus
Go round and round
All around the town.

Verse 2:
The wipers on the bus
Go swish, swish, swish
Swish, swish, swish
Swish, swish, swish.
The wipers on the bus
Go swish, swish, swish
All around the town.

Verse 3:
The horn on the bus
Goes beep, beep, beep
Beep, beep, beep
Beep, beep, beep.
The horn on the bus
Goes beep, beep, beep
All around the town.

Verse 4:
The doors on the bus
Go open and shut
Open and shut
Open and shut.
The doors on the bus
Go open and shut
All around the town.

Verse 5:
The babies on the bus
Go “Boo-hoo-hoo!
Boo-hoo-hoo!
Boo-hoo-hoo!”
The babies on the bus
Go “Boo-hoo-hoo!”
All around the town.

Verse 6:
The driver of the bus
Says “Please sit down!
Please sit down!
Please sit down!”
The driver of the bus
Says “Please sit down!
All around the town.

Verse 7:
The wheels on the bus
Go round and round
Round and round
Round and round.
The wheels on the bus
Go round and round
All around the town.


Gestures and activities to use with “The Wheels on the Bus” song

The actions of the song are really easy and mimic what is happening in the song.

  • For verse 1, whirl your arms around in the air for “The wheels on the bus go round and round …” part.
  • For verse 2, swish your arms lefts and right for “The wipers on the bus go swish, swish, swish …” part.
  • For verse 3, beep an imaginary horn for “The horn on the bus goes beep, beep, beep …” part.
  • For verse 4, swish your arms back and forth for “The doors on the bus go open and shut …” part.
  • For verse 5, put your fists to your eyes and mimic crying for “The babies on the bus go boo-hoo-hoo …” part.
  • For verse 6, look angry and wave your finger for  “The driver on the bus says “Please sit down” …” part.
  • Verse 7 is the same as verse 1


Using ”The Wheels on the Bus” song in class

This is a really popular song which kids just love to sing along to.  The song introduces some great vocab and makes for a good ‘present simple’ lesson.

  1. Introduce the vocab with a drawing exercise. For this lesson you are going to use your artistic drawing skills.
    • Start by drawing a large picture of a bus on the board – make it as large as you can, filling the whole board.  Elicit / teach / chorus the word “bus”.
    • Next, shade in the wheels and again elicit / teach / chorus the word “wheels”.  Now teach the action word “go round and round” and get everybody making round and round movements with their arms as you say “The wheels on the bus go round and round”.
    • Now draw wipers onto the picture and teach “wipers” and “swish” and get everyone to do the swishing action with their arms.
    • Then draw a steering wheel (through the window) and motion driving and honking the horn.  Teach and practice “horn” and “beep”.
    • Draw the doors on the bus and teach “doors”, “open and shut” and practice do opening and shutting actions with your arms.
    • Now for the tough bit – drawing babies on the bus!  Draw the windows and draw babies looking out.  You can show flashcard pictures if your drawing is not up to scratch! Teach and practice “babies”, “boo-hoo”.
    • Finally, draw the driver sitting on the bus holding the steering wheel.  Teach / practice “driver”, “Please sit down”.  When teaching “Please sit down” get everyone standing up and have fun telling everyone to sit down and stand up, so they all get the meaning.
  2. Play “I say, you do”. Now to practice the vocab.  Get everyone to stand up facing the teacher.  Start by saying a random sentence from the song (e.g. “The doors on the bus go open and shut”) and get everyone to do the action.  At first go slowly, saying different sentences and having everyone do the action from the gestures section above.  Then go faster and faster until it is impossible to keep up.
  3. Sing “The Wheels on the Bus”. First play the song and get everyone to follow you with the actions.  Then play the song again and encourage everyone to sing along.
  4. Draw the bus pair work activity. Put everyone in pairs and give them a large piece of plain paper (A3 size is good).  Each pair will have to cooperate to draw the same picture as yours on the board.  Give the first instruction “Everybody draw a bus” and encourage each pair to work together to draw the outline of the bus.  Then give the next instruction “Now draw the wipers”.  As they are doing so ask random students what wipers do (“swish- swish-swish”).  Keep going until all the pictures are complete and colored in.  Finally, pin all the pictures to the walls and have each pairs stand in front of their pictures.  Play the song one more time, and have the students touch the parts of the picture as it is mentioned in the song (e.g. they touch the wipers on the line “The wipers on the bus go swish, swish, swish”)
  5. Do a “Take the Bus” role-play. This is the show stopper which your students will love.  Arrange all the chairs so that they are facing forwards in rows, just like on a bus.  The teacher can be the driver (if you can find a driver’s cap to wear, all the better!).  Get everyone to line up outside the bus (at the bus stop) and ‘drive’ the bus to the bus stop.  Everyone can enter the bus, pay for their ticket (prepare tickets before class and ever use toy money) and then sit down.  Then start driving the bus and as you go, shout out “lean left!” and “lean right” as you go around corners and get everyone to lean with you.  Do lots of other fun things, such as:
    • beep the horn (everyone does together)
    • stand up and sit down to help go up and down hills (Don’t forget to say “Please sit down”)
    • stop!!!  (everyone lurches forward)
    • speed up!!! (everyone is pushed back in their seats
    • jump up and down (when the bus gets stuck in mud)

    At the end, pull up to the stop and shout “Everybody, get off the bus!”  You can even invite other students to take on the role of bus driver.

  6. Set Homework: For homework, give out the “Bus Draw” worksheet.


New Song: Numbers 1-20 Song

$
0
0

Download a new song from ESL KidStuff: Numbers 1-20 Song

Numbers 1-20 SongNumbers 1-20 Song

Song Theme: Counting up to 20
Target Vocab: Numbers 1-20
Song Length: 1:09

A quick counting song.

(Members can log in to download the full song)

Lyrics:

Verse 1:
1 – 2 – 3 – 4 – 5
6 – 7 – 8 – 9 – 10
1 – 2 – 3 – 4 – 5 – 6 – 7 – 8 – 9 – 10

Verse 2:
11 – 12 – 13 – 14 – 15
16 – 17 – 18 – 19 – 20
11 – 12 – 13 – 14 – 15 – 16 – 17 – 18 – 19 – 20

Verse 3:
1 – 2 – 3 – 4 – 5 – 6 – 7 – 8 – 9 – 10
11 – 12 – 13 – 14 – 15 – 16 – 17 – 18 – 19 – 20

Ok … Let’s do all the numbers!

1 – 2 – 3 – 4 – 5 – 6 – 7 – 8 – 9 – 10
11 – 12 – 13 – 14 – 15 – 16 – 17 – 18 – 19 – 20


Gestures and activities to use with “Numbers 1-20 Song” song

There are a few activities you can do with this song.

  • Before playing the song write the numbers 1-20 on the board.  Keep them large and in order.  Everyone sings along as the teacher points to each number.
  • Have the numbers 1-20 printed on A4 sheets of paper and stuck around the walls of the classroom.  As the song is sung, everybody has to point to the correct number (the numbers can be put on the walls in the correct order or for a more difficult activity, in random order!).
  • Giving everybody a copy of the Numbers 1-20 song poster.  As the song is being played the students must sing along and touch each number as it is sung.


Using “Numbers 1-20 Song” in class

This should not be taught before the Numbers 1-10 lesson.  Once your students can count to 10 this lesson will help them to reach 20!

  1. Review numbers 1-10. First write the numbers 1-10 on the board and have everyone shout out the numbers as you write them.  Next, get 10 soft balls, cubes or something similar (before class, tape numbers 1-10 onto the balls) and chorus the numbers on each ball.  Then throw the balls around the room and ask individual students to bring you different numbers (e.g. “Maria, please give me number 6″). Finally, play and sing along to “The Numbers Song (Numbers 1-10)“.
  2. Play “Pass the Parcel Numbers 11-20″.  You are going to play a version of “Pass the Parcel” to introduce the numbers 11-20.  Before class get 10 sheets of A4 paper and write a number (11-20) on each sheet.  Shuffle the papers up so they are ordered randomly.  Now make your parcel – roll one sheet of paper onto a ball (with the number on the inside) and then wrap the next sheet (number inside) around the ball.  Keep wrapping the sheets around the ball until all are used up and you have a parcel.  If you like, you can include a small sweet with each sheet of wrapped paper.

    In class, get everybody to sit in a circle.

    • Play some music and have everybody pass the parcel around the circle until you stop the music.  The person holding the parcel when you stop the music can unwrap the first layer.  Ask for that sheet of paper and stick it on the board with the number showing.  At this point there is no need to teach the number.
    • Start the music again and then stop it after the parcel has been passed around a while.  The student holding the parcel can unwrap the next sheet and look at the number.  S/He should then stick it on the board either to the left or right of the number already there, depending on if it comes before or after that number (e.g. if the first number was 15 and the second one is 19, then it should be placed after the 15).
    • Keep playing “Pass the Parcel” until all the numbers are stuck on the board in the correct order 11-20
  3. Teach numbers 11-20. Now that you have all the numbers on the board, you can chorus them with your class.  Start with 11 and chorus it 3 times with the class.  Continue with all the numbers.  Now chorus each number in turn (11, 12, 13, etc.) and run through 11-20 a few times, each time getting faster and faster.  Now, put your class into pairs.  Have each pair practice saying the numbers together (e.g. A: 11, b: 12, A: 13, B: 14, etc.).
  4. Play “Stand in the right order”. Next give each student a number sheet from the board.  If you have more than 10 students make more numbers so you have two groups.  For less than 10 students, give out more sheets per student but make sure the numbers they have are in sequence (e.g. give a student numbers 14 and 15, not 14 and 18).  Now tell your students to stand in a line in the right order.  Everyone has to shuffle around until they are standing and holding their numbers in order 11-20.  Now, get the class to shout out their numbers from 11-20, down the line.  Make it a game – each round try and do it faster than the last!
  5. Do the “Write the numbers 1-20 on the board” activity.  You are going to get everyone to help write the numbers on the board which you can use when singing the “Numbers 1-20 Song”.  Draw 20 large squares on the board 4 rows.  Call out a student and ask him/her to write a large number 1 in the first box.  Keep calling out students to fill in the rest of the squares so you have all of the numbers 1-20 on the board.
  6. Sing the “Numbers 1-20 Song”.  Play the song and have everybody call out the numbers along with the song.  It will help a lot if you point to each number on the board as it is sung.  It is a really fast paced song so keeping up might be a challenge but this makes it fun.  Play the song a few times until everyone can sing along well.  Also worth doing is giving everybody a copy of the Numbers 1-20 song poster.  As the song is being played the students must sing along and touch each number as it is sung.
  7. Do the “1-20 Balls Write 1” worksheet.  Give out the worksheet and circulate and help as the students write the numbers.
  8. Set Homework: For homework, give out the “1-20 Balls Write 2” worksheet.


New Song: Describe Your Friend

$
0
0

Download a new song from ESL KidStuff: Describe Your Friend

Describe Your Friend songDescribe Your Friend

Song Theme: Using adjectives to describe the physical appearance of people
Target Vocab: What does s/he look like?, Tell me all about him/her, s/he is/has …, tall, short, long hair, short hair, brown eyes, blue eyes, blonde hair, black hair, s/he is great.
Song Length: 1:01

A lively song about describing your best friend which includes descriptive adjectives and 3rd person he / she.

(Members can log in to download the full song)

Lyrics:

Tell me about your best friend!

Chorus:
What does he look like?
Tell me all about him.

Verse 1:
He is tall
He has short hair
He has brown eyes
He has blonde hair
But most of all, he is great!

Tell me about your best friend!

Chorus:
What does she look like?
Tell me all about her.

Verse 2:
She is short
She has long hair
She has blue eyes
She has black hair
But most of all, she is great!


Gestures and activities to use with the “Describe Your Friend” song

There are no gestures for this song – a listening activity with worksheets accompanies the song (see point 3 below).  However, if students enjoy the song you can encourage them to sing along and dance!

Here are the worksheets: Describe Your Friend song worksheets

  • The first two pages is the song poster.
  • The next page “Describe your Friend Worksheet 1″ is a ‘listen and circle what you hear’ exercise.
  • The final page “Describe your Friend Worksheet 2″ is a ‘listen and draw’ exercise (this is better if you can’t print out the color Worksheet 1)


Using the “Describe Your Friend” song in class

This is a really lively song which can be used as an active listening task – students have to listen to the song to complete their worksheets.

  1. Introduce the descriptions vocab. For this lesson you are going to use your artistic drawing skills. Use a whiteboard or blackboard to draw the following:
    • At the top of the board draw 2 circles (these will be the heads). Elicit “circles”.
    • On each head draw a nose, ears and a mouth. Elicit each as you draw them. Then ask “What’s missing?”.
    • Elicit “eyes”. Ask “What color are they?” and give the students the options of the colors of markers / chalk you have. Then draw the eyes in the chosen colors with different colors for each set of eyes (NB: it’s ok to have strange colors, such as yellow, for the eyes – this will just make it more fun).
    • Elicit “hair” and again ask “What color is it?”. On one head draw long hair in one color (for the girl) and on the other draw short hair (for the boy) in a different color. Teach / Elicit “long / short hair”.
    • Finally, you’ll need to draw 2 bodies. But rather than you draw them you are going to ask for 2 volunteers to do the drawings. For the girl, draw some shoes quite near the head (so that she will be short) and for the boy draw some shoes right down at the bottom of the board (so he will be tall). Have the students draw the bodies so that they join the heads with the shoes. Now teach / elicit “tall / short”.

      It should end up looking something like this:

      Describe Your Friend Board Image

    • Now that the completed pictures are on the board, chorus 3 times the following sentences and point to the pictures as you do:
      - He is tall.
      - He has short hair.
      - He has (blue) eyes.
      - He has (orange) hair.

      - She is short.
      - She has long hair.
      - She has (green) eyes.
      - She has (brown) hair.

  2. Do “Funny Body” drawings. Give a piece of A4 paper to each student and yourself.
    • On your piece of paper, model drawing a head with eyes, nose, ears, mouth, teeth and hair. Make it a really funny picture. Then tell everyone to draw their funny head. Make sure they use colors for the eyes and hair.
    • Next show them how to fold the paper so only the neck shows (so the head is folded behind). Then get everyone to pass their paper to a different student.
    • Now model drawing the body starting from the neck and going down to ankles – make it either a really short or long body and make it as funny as you can. Now have your students draw their bodies.
    • Again, show everyone how to fold the paper so only the ankles are showing and have everyone pass their paper to another student.
    • Finally, model drawing funny feet and get everyone to draw feet on their pictures. Then get everyone to fold up their papers and return each piece to the person who drew the head.
    • Let everyone open up their paper and have a good laugh at the pictures. Now ask everyone to “present” their person in the drawing to the rest of the class – you model first (e.g. “This is Tom. He is short. He has pink hair, etc.”).
  3. Play the “Describe Your Friend” song and do the active listening worksheet. Tell the class that they are going to listen to a song about a boy and a girl.  Give out either “Describe your Friend Worksheet 1″ or “Describe your Friend Worksheet 2″ (worksheet 2 is better if you cannot print out colored worksheets).  Read the instructions to the class and then play the song.  As they song is playing students should do the worksheet activity.  Play the song again if required.  Finally, go through the song one more time stopping to check answers.  If everyone enjoyed the song, you can play it again and have everyone sing along (especially as it’s such a catchy tune!).
  4. Do the “Describe Your Friend Class Survey“. This will give your students the chance to use the lesson structures.  Give out the class survey worksheet. Each student should work on their own for a few minutes looking at their classmates and filling in the table about 6 of their friends in the class.  Whilst they are doing this, circulate and check and ask questions.  Finally, once everyone has finished, ask each student to describe some of their friends: Ask, “Tell me about your friend”, “What does he / she look like?”.  Then put students in pairs to practice asking about their classmates.

    Additional activity: Have your students ask about and describe family members (e.g. brothers, sisters, parents, grandparents, etc.).

  5. Play “Guess Who?”. For this activity, you’ll need lots of magazine pictures of people.  Try and get lots of different types of people pictures, with different color eyes and hair.  The more pictures you can find and cut-out before class the better (Note: This is a great resource to have for future lessons, as people pictures can be used in many different ways).  In class, lay out all of pictures on the floor or on a large table.  Start by saying “My friend has (short, brown) hair, he is (tall) and he has (green) eyes”.  Everyone should try and guess which picture you are describing.  You can also give additional clues (clothes, etc.).  The student who guesses correctly can then have a go describing someone.  Now that everyone has got the idea of the game, put student into small groups and have them play the game together.  Whilst they are playing, monitor, help and encourage the use of the lesson structures.
  6. Set Homework: For homework, give out the “Describe Your Family” worksheet.


Happy Halloween! song

$
0
0

Download a new song from ESL KidStuff: Happy Halloween!

Happy Halloween SongHappy Halloween!

Song Theme: Talking about Halloween and popular Halloween characters
Target Vocab: Halloween, ghost, monster, witch, black cat, wizard, mummy, bat, zombie, Look there’s a/an, Look out of the window, What will we see?, Go outside in the street, Who will we meet?.
Song Length: 2:26

A spooky song describing what you can see and meet on Halloween night.

(Members can log in to download the full song)

Lyrics:

Happy Halloween!  Happy Halloween!

Happy, Happy Halloween!  Happy, Happy Halloween!

Chorus:
Look out of the window tonight,
What will we see on Halloween night?
Go outside in the street tonight,
Who will we meet on Halloween night?

Verse 1:
Look there’s a ghost (Whooooooooo!)
Look there’s a monster (Rhhaaaaaa!)
Look there’s a witch (Cackle cackle!)
Look there’s a black cat (Meoooowwww!)

But don’t worry – they’re just kids! Wearing costumes!

Happy, Happy, Happy Halloween!

Chorus

Verse 2:
Look there’s a wizard (Ho ho hoooo!)
Look there’s a mummy (Grrrrrrrrrr!)
Look there’s a bat (Eeekk! Eeekk!)
Look there’s a zombie (Rrrrrrrrrrrrrrr!)

But don’t worry – they’re just kids! Wearing costumes!

Happy, Happy Halloween!
Happy Halloween!


Gestures and activities to use with the “Happy Halloween” song

If you can get everyone to dress up in a Halloween fancy dress costume for the class it will make the whole experience more fun! 

  • Happy, Happy Halloween!” – sing and dance along to this (dancing like zombies or monsters – like in Michael Jackson’s Thriller).
  • Look out of the window tonight” – everyone puts their hand above their eyes to ‘peer’ out of the window with a frightened expression.
  • What will we see on Halloween night?” – look around with a frightened expression.
  • Go outside in the street tonight” – walking on the spot.
  • Who will we meet on Halloween night?” - look around with a frightened expression.
  • Look there’s a ghost (Whooooooooo!)” – all do a ghost gesture and say “Whoooooooo!”.
  • Look there’s a monster (Rhhaaaaaa!)” – all walk like a scary monster and say “Rhhaaaaaa!”.
  • Look there’s a witch (Cackle cackle!)” – everyone wiggles their fingers in front of their face like a witch whilst cackling.
  • Look there’s a black cat (Mioooowwww!)” – all act like a cat whilst meowing.
  • Look there’s a wizard (Ho ho hoooo!)” – all wave imaginary wands in the air and say “Ho ho hoooo!”.
  • Look there’s a mummy (Grrrrrrrrrr!)” – walk around with arms stretched out in front and say :Grrrrrrr!”.
  • Look there’s a bat (Eeekk! Eeekk!)“- all flap around and say “Eeekkk! Eeekkk!”.
  • Look there’s a zombie (Rrrrrrrrrrrrrrr!)“- do the zombie dance/walk (as in Thriller) and say “Rrrrrrr!”.


Using the “Happy Halloween” song in class

Please check our free Halloween Lesson Plan page for ideas to use in your Halloween lessons.


I Don’t Like Cheese! (Likes & Dislikes song)

$
0
0

Download a new song from ESL KidStuff: I Don’t Like Cheese!

I Don't Like Cheese songI Don’t Like Cheese (Likes & Dislikes song)

Song Theme: Talking about your likes and dislikes
Target Vocab: I like ~, I don’t like~, cheese, chocolate, rice, French fries, strawberries, bread, ice cream, grapes, pasta, pizza, beans, food, drink, very nice, what a stink!.
Song Length: 1:27

A funny song about food likes and dislikes.

(Members can log in to download the full song)

Lyrics:

Verse 1:
I like chocolate,
I like rice,
I like French fries,
They’re very nice,
I like strawberries,
I like bread,
Oh no, what’s that?
I don’t like cheese!

Chorus:
Cheese, cheese,
I don’t like cheese,
Cheese, cheese,
Don’t give me, please!
I like lots of food,
I like lots of drink,
But as for cheese – what a stink!

Verse 2:
I like ice cream,
I like grapes,
I like pasta,
It tastes great!
I like pizza,
I like beans,
Oh no, what’s that?
I don’t like cheese!

Chorus


Gestures and activities to use with the “I Don’t Like Cheese” song

There are no gestures for this song – a listening activity with worksheet accompanies the song (see point 3 below). However, if students enjoy the song you can encourage them to sing along and dance!

Here is the worksheet: Click here to download the “I Don’t Like Cheese” song worksheet

  • students listen to the song and draw the food items they hear in the ‘I like’ and ‘I don’t like’ columns (only cheese is in the “don’t like” column). The song runs through the vocab pretty quickly, so play the song at least twice.


Using the “I Don’t Like Cheese” song in class

This is a really fun song which uses the key structures in a funny way – students have to listen to the song to complete their worksheets.

  1. Introduce “I like” and “I don’t like”. Start off by preparing your board as shown below (without the food drawings).  Also, have the following flashcards printed out (just in case): cheese, chocolate, rice, French fries, strawberries, bread, ice cream, grapes, pasta, pizza, beans.

    The board should be divided into two sections: “likes” on the left and “dislikes” on the right (indicated with a smiley and unhappy face).

    Food & Drink Board

    As a class you are going to draw food and drink items you like and don’t like, as follows:

    • First, draw a food or drink in the ‘like’ column (such as a banana).  Get everyone to shout out what you have drawn.  Gesture that you like this (say “Yummy!” and rub your tummy and smile – make it obvious that you like it a lot).  Say “I like bananas”.
    • Next, draw something in the ‘dislike’ column (such as a tomato).  Again, get everyone to shout out what you have drawn.  Gesture that you don’t like this (say “Yuk!” or “It stinks!” and grimace – make it obvious that you don’t like it).  Say “I don’t like tomatoes”.
    • To make sure everyone understands, draw another food/drink item in the like and dislike columns, using the same structures and gestures as before.  This will turn into a fun guessing game as everyone tries to guess what is being drawn.
    • Next, your students are going to draw some pictures on the board.  Invite a student up and point to the ‘like’ column and say “Draw a food or drink that you like”.  When the student draws the item, everyone has to guess what it is.  Then get the student to say “I like ~”.  The next student should draw something in the ‘dislike’ column and say “I don’t like ~”.  Keep bringing students up to the board to draw their likes and dislikes until the board is pretty full.
    • If any of the items from the song haven’t been drawn (cheese, chocolate, rice, French fries, strawberries, bread, ice cream, grapes, pasta, pizza, beans) use the flashcards to get them on the board: hold up each picture and elicit the word, then ask students to place the flashcard (use blue tak or tape) on the board in the column of their choice (whilst saying “I like ~” or “I don’t like~”).
  2. Controlled Practice saying “I like ~” and “I don’t like ~”. Put the students into pairs.  They are going to make sentences using the food and drink items on the board.  Model with a student first so everyone understands what to do: Teacher says “banana” – choosing an item from the board.  The student has to make a sentence (e.g. “I like bananas”),  The answer should be the student’s own true answer.  Then in pairs, students take turns in choosing a food item for their partner to make a sentence about.  For example:

    Student A: apples
    Student B: I like apples!

    Student B: carrots
    Student A: I don’t like carrots!

    Also, encourage the use of phrases such as “Yummy”, “Yuk” and “It stinks”. Pairs keep talking until they have gone through all of the items on the board.

  3. Play the song “I Don’t Like Cheese” and students fill in their worksheets. For this song, students listen and fill in their worksheets by drawing the different food items they hear.  The song runs through the vocab pretty quickly, so play the song at least twice.

    Click here to download the “I Don’t Like Cheese” song worksheet.

    After playing the song a few times, elicit the answers and put the flashcards on the board in the right columns so everyone can check (there will only be “cheese” in the ‘I don’t like’ column). Play the song through once more, pointing at the items on the board – encourage everyone to sing along.  Alternatively, you could use the “I Don’t Like Cheese” song poster.

  4. Magazine cut outs. Now everyone is going to make a poster showing the food and drink they like / dislike.  You will need some supermarket magazines for this – many supermarkets have free magazines showing the food they have on sale – collect as many as you can before the lesson.  Give each student a large piece of paper (construction paper or card, if possible), scissors, glue and a magazine (you can group students together to share magazines).  On the paper, each student should write their name at the top and then make a table with two columns titled “I like …” and “I don’t like”.  Then they can go through the magazines and cut out and glue food and drink pictures into the correct column on their posters.

    As the students are working on this, circulate, helping with vocab and asking questions (e.g. What’s this, Do you like ~, etc.).

    When everyone has finished, get each student to hold up their posters and explain what they like and dislike.  If you have a large class, you can do this in pairs or groups.

  5. Play the “Funny Food Likes & Dislikes Game”.  This is a really fun way to end the lesson.  You will need put the class into groups of 3 or 4 and give each group a die and the following handout (if you can enlarge it to A3 size it would be better):

    Funny Food Likes & Dislikes Game handout

    Instructions:
    Before the game starts write the following on the board:

    1. pizza
    2. soup
    3. ice cream
    4. sandwich
    5. juice
    6. cake

    1. Play the game in groups of 3 or 4.  Everyone sits around the game board.  Decide who goes first and play in a clockwise direction around the game board.
    2. Player 1 rolls a die onto the game board paper. Look at which food item it lands on and the number of the die.
    3. The player must then make a sentence with the food item and using the number on the board.  E.g. If the die lands on the cheese picture and number 3 s/he must say:

      “I don’t like cheese ice cream!”
      or
      “I like cheese ice cream” (in this case, probably not!)

    4. Cross out that picture with a pencil.
    5. The next player must roll the die.  If the die lands on a crossed out picture s/he misses a turn (also miss a turn if the die doesn’t land on a picture at all).  If the die lands on a new picture, s/he must make another like  / don’t like sentence.
    6. The game continues until all of the pictures are crossed out.

    At the end of the game you can ask everyone to tell you the strangest thing they made a sentence about (e.g. “I don’t like hamburger ice cream!”).

  6. Set Homework: For homework, give out the “Food likes & dislikes 1” or “Food likes & dislikes 2” worksheet (depending on the level of your students).


Let’s Get Dressed song

$
0
0

Download a new song from ESL KidStuff: Let’s Get Dressed

Let's Get Dressed songLet’s Get Dressed (Clothes song)

Song Theme: Talking about different clothes
Target Vocab: Let’s get dressed, Put on your ~, quick, get ready, shirt, pants/trousers, socks, jacket, shoes, hat.
Song Length: 1:29

A song about getting dressed with a brilliant dressing up game to play.

(Members can log in to download the full song)

Lyrics:

It’s time to go to school
Let’s get dressed!

Put on your shirt, put on your shirt,
Quick, get ready, put on your shirt.

Put on your *pants, put on your *pants,
Quick, get ready, put on your *pants.

Put on your socks, put on your socks,
Quick, get ready, put on your socks.

Put on your jacket, put on your jacket
Quick, get ready, put on your jacket.

Put on your shoes, put on your shoes,
Quick, get ready, put on your shoes.

Put on your hat, put on your hat,
Quick, get ready, put on your hat.

It’s time to go to school,
Quick, get ready, let’s get dressed!

(* In the British English version of the song the word “pants” is replaced with “trousers”).


Gestures and activities to use with the “Let’s Get Dressed” song

During the song your students will play a wonderful dressing up game – a lot of fun!  Before class you need to collect as many old (adult size) clothes as you can for the following vocab: shirt, pants/trousers, socks, jacket, shoes, hat.  If you can’t get enough, ask parents to bring in some old clothes for the lesson.  The clothes need to be adult size as the students are going to put them over their own clothes – having such big clothes actually makes the activity more fun!

Depending on how many clothes you can find, you can either have everyone dress up at the same time or you can have a few students come up to the front of the class to do the activity.

Pile the clothes in a big heap and start the song.  As the first clothing item is mentioned (shirt) the students have to scramble in the pile of clothes to find a shirt and put it on before the next item of clothing is mentioned. As the song is played the students put on all the clothes until they are fully dressed.  Then finish the game by getting the students to race in taking off their adult-sized clothes – the first to remove them all is the winner!


Using the “Let’s Get Dressed” song in class

This is an active song which can be used to play a really fun dressing up game. NOTE: You will need to prepare some old clothes to use in the lesson (see point 1 below):

  1. Prepare as many old (adult-sized) clothes as possible. Before class you need to collect as many old (adult size) clothes as you can. Have at least the following: shirt, pants/trousers, socks, jacket, shoes, hat – however, other clothes will be useful as well, such as skirt, dress, coat, jeans, shorts, blouse, sweater, neck tie, t-shirt, vest.  If you can’t get enough, ask parents to bring in some old clothes for the lesson.  The clothes need to be adult size as the students are going to put them over their own clothes – having such big clothes actually makes the activity more fun!
  2. Introduce the vocab. No doubt the large pile of clothes in the classroom will have attracted a great amount of attention, so you’ll have little difficulty in introducing the topic!  Settle the class down and get everyone to sit down.  Ask for a volunteer and have them stand at the front of the class with you.  Tell the class the volunteer is going to get dressed up – with as many different types of clothes as possible!  Pull out the first clothing item (e.g. a t-shirt).  Elicit / teach and chorus the word for the item.  Then help your volunteer to put it on.  Only put on each item of clothing when you are satisfied that everyone has chorused the word correctly.  Then move onto the next clothing item.  As you select each item think about the order – you’ll want your volunteer to be putting the jacket, shoes and hat on last.  Keep adding clothes until your volunteer is really well dressed up.
  3. Practice the clothing vocab with flashcards. Help the volunteer undress and then get everyone to look at the board.  Make sure you have the same clothing flashcards as the old clothes you are using. Stick the first flashcard on the board and elicit the vocab and write the word clearly below it.  Do the same for all of the other flashcards.  Next tell everyone to close their eyes and remove one of the flashcards from the board.  Now shout “Open your eyes” – everyone must shout out the missing flashcard.  Play this until all the flashcards have been elicited.
  4. Play “Team Racing”. Divide the class into 2 teams.  Line up the 2 teams at one end of the classroom with the old clothes on the floor at the other end.  You will shout out an instruction (e.g. “Put on some socks!”) and one member from each team will race against the other to the pile of clothes, put on the clothing item and run back to their team.  The person who gets back first wins a point for his/her team.  At the end, the team with the most points is the winner.
  5. Sing “Let’s Get Dressed”. Prepare everyone for the song first.  Make sure the following clothes are on the floor: shirt, pants/trousers, socks, jacket, shoes, hat.  If you have enough for everyone to get dressed at the same time you can do the song with everyone participating with the actions.  If not, have a few students do the song actions while everyone else sings along (the words are simple) – you can give everyone a go by playing the song a few times.

    The song is also an active listening exercise.  Students will have to listen for the clothing item and then put it on.  Pile the clothes in a big heap and start the song.  As the first clothing item is mentioned (shirt) the students have to scramble in the pile of clothes to find a shirt and put it on before the next item of clothing is mentioned. As the song is played the students put on all the clothes until they are fully dressed.  Then finish the game by getting the students to race in taking off their adult-sized clothes – the first to remove them is the winner!

  6. Do cut and paste craft sheets.  We have two different cut and paste craft sheets for clothes: “Dress Up Craft“(for lower levels) and “Clothes Craft” (for higher levels).  For younger students, cut out the clothes before class so they only need to color and glue the clothes onto the bodies.  You can do this craft as an active listening exercise but giving instructions on which clothes to cut out and what colors they should be:

    E.g. “First cut out the socks, color them blue and glue them on the boy”

    So that everyone has to listen and cut out/color the correct items.

  7. Create a “Clothes Catalogue Scene“. For this you will need to bring in some old catalogues or magazines.  Put the class into small groups and give each group a large piece of construction paper / card, scissors, glue and some felt tip pens. Tell the class that they have 10 minutes to create a scene with lots of people: the students will have to cut out clothes and draw to create the picture.  It will help if you have already created your own scene so students can see what they have to do.  As everyone is creating their scenes, walk around the classroom asking lots of questions related to the vocab (What is he wearing?, etc.) and helping with any new vocab.

    Finally, have each group present the scene using the structure “He / She is wearing” (e.g. “She is wearing a blue hat”).  You can put all the scenes on the classroom walls as decoration and to review in future lessons.

  8. Set Homework: For homework, give out the “Colorful Clothes” or “Jungle Clothes” worksheets (depending on the level of your students).


New Song: The Thanksgiving Song!

$
0
0

Download a new song from ESL KidStuff: The Thanksgiving Song!

Thanksgiving SongThe Thanksgiving Song!

Song Theme: Singing about the Thanksgiving turkey
Target Vocab: Thanksgiving, turkey, hello, how are you? gobble, wobble, hip hip hooray!
Song Length: 1:38

A Thanksgiving themed song with lots of fun turkey actions!

(Members can log in to download the full song)

Lyrics:

Verse 1:
Hello Mr. Turkey, Hello Mr. Turkey
How are you? How are you?
Hello Mr. Turkey, Hello Mr. Turkey
How are you? How are you?

With a “Gobble, gobble, gobble, gobble,
gobble, gobble, gobble, gobble, gobble”

And a “Wobble, wobble, wobble, wobble,
wobble, wobble, wobble, wobble, wobble”

Happy, Happy Thanksgiving
Hip hip hooray! Hip hip hooray!

Verse 2:
Hello Mr. Turkey, Hello Mr. Turkey
How are you? How are you?
Hello Mr. Turkey, Hello Mr. Turkey
How are you? How are you?

With a “Gobble, gobble, gobble, gobble,
gobble, gobble, gobble, gobble, gobble”

And a “Wobble, wobble, wobble, wobble,
wobble, wobble, wobble, wobble, wobble”

With a “Gobble, gobble, gobble, gobble, gobble”
And a “Wobble, wobble, wobble, wobble, wobble”

“Gobble, gobble, gobble, gobble, gobble”
“Wobble, wobble, wobble, wobble, wobble”

Happy, Happy, Happy Thanksgiving
Hooray!


Gestures and activities to use with “The Thanksgiving Song”

The actions for this song are simple, fun and energetic – who wouldn’t enjoy running around like a turkey?!

Everyone stands up for the song:

  • “Hello Mr. Turkey, Hello Mr. Turkey” – everyone sings and waves.
  • How are you? How are you?” – do the question gesture (palms up with inquisitive face).
  • With a gobble … And a wobble…” – this is the really fun bit. Everyone runs around like a turkey (crouched over, flapping elbows in a wobbly fashion) while gobbling!
  • Happy, Happy Thanksgiving” – stop running around and sing.
  • Hip hip hooray!” – throw arms up in the air in celebration!


Using ”The Thanksgiving Song” in class

Please check our free Thanksgiving Lesson Plan page for ideas to use in your Thanksgiving lessons.


Christmas Songs for ESL Kids – downloads

$
0
0

Download 2 new songs from ESL KidStuff: “We Wish You a Merry Christmas” & “Jingle Bells”

We have added two songs for download to use in your ESL kids Christmas lessons.  Both songs have been adapted so that they are much easier for kids learning English (see our discussion in an earlier article on adapting Christmas Carols).

We Wish You A Merry Christmas SongWe Wish You a Merry Christmas (adapted)

Song Theme: Talking about Christmas and Christmas traditions
Target Vocab: Merry Christmas, Happy New Year, Santa, Rudolf, sleigh, presents, Christmas tree, decorations, roast turkey, Christmas pudding.
Song Length: 2:22

A classic Christmas song with easier lyrics for kids learning English.

(Members can log in to download the full song)

Lyrics:

Chorus:
We wish you a Merry Christmas,
And a Happy New Year.

Verse 1:
Santa and Rudolf,
Will fly in their sleigh,
We’ll open our presents,
And have a great day!

Chorus

Verse 2:
Our Christmas tree’s up,
With decorations,
We’ll eat a roast turkey,
And Christmas pudding.

Chorus

Verse 3:
Santa and Rudolf,
Will fly in their sleigh,
We’ll open our presents,
And have a great day!

Chorus

Verse 4:
Our Christmas tree’s up,
With decorations,
We’ll eat a roast turkey,
And Christmas pudding.


Using the “We Wish You a Merry Christmas” song in class

Please check our free Christmas Lesson Plan page for ideas to use in your Christmas lessons.


Jingle Bells SongJingle Bells (adapted)

Song Theme: Talking about Christmas and Christmas traditions
Target Vocab: Jingle Bells, riding, snow, Santa, Rudolf, sleigh, laughing, bells, nose, shining, roof, chimney, fast asleep, Christmas tree, Merry Christmas, shout.
Song Length: 1:22

A classic Christmas song with easier lyrics for kids learning English.

(Members can log in to download the full song)

Lyrics:

Verse 1:
Riding through the snow, Rudolph pulls the sleigh,
Santa sits inside, laughing all the way,
Bells are ringing clear, nose is shining bright,
Rudolf and Santa are coming to your home tonight!

Chorus:
Jingle bells, jingle bells, jingle all the way!
O what fun it is to ride with Santa in his sleigh.
Oh! Jingle bells, jingle bells, jingle all the way!
O what fun it is to ride with Santa in his sleigh.

Verse 2:
Landing on our roofs, going down chimneys,
Leaving Christmas presents, under Christmas trees,
We’re all fast asleep, as Santa rides about,
In the morning we’ll wake up and “Merry Christmas” shout!

Chorus:
Jingle bells, jingle bells, jingle all the way!
O what fun it is to ride with Santa in his sleigh.
Oh! Jingle bells, jingle bells, jingle all the way!
O what fun it is to ride with Santa in his sleigh.


Using the “Jingle Bells” song in class

Please check our free Christmas Lesson Plan page for ideas to use in your Christmas lessons.


What Time Is It? song

$
0
0

Download a new song from ESL KidStuff: What Time Is It?

What Time Is It?What Time Is It?

Song Theme: Saying and asking for the time
Target Vocab: What time is it?, Please could you tell me the time?, It’s _ o’clock
Song Length: 1:09

A simple song which helps to practice the structures for telling the time.

(Members can log in to download the full song)

Lyrics:

Tick-tock-tick-tock
Tick-tock-tick-tock

Chorus:

What time is it?
What time is it?
Please could you tell me the time?

Verse 1:

It’s one o’clock
It’s two o’clock
It’s three o’clock
It’s four o’clock
It’s five o’clock
It’s six o’clock

Tick-tock-tick-tock
Tick-tock-tick-tock

Chorus

Verse 2:

It’s seven o’clock
It’s eight o’clock
It’s nine o’clock
It’s ten o’clock
It’s eleven o’clock
It’s twelve o’clock

Tick-tock-tick-tock
Tick-tock-tick-tock


Gestures and activities to use with the “What Time Is It?” song

For this song your students are going to be human clocks, using their arms to show the time.  Have everybody stand up with plenty of room to move their arms around without hitting anyone.

  1. For the question words sing along and hold your hands out, palms up, in the question gesture.
  2. For the times, hold your arms straight out in the time position.  So, for 1 o’clock, hold one arm straight up towards 12 and the other arm towards one.  As the song continues, one arm will move around the clock counting off each hour.


Using the “What Time Is It?” song in class

This is a really good song for introducing your students to telling the time as it contains key vocab and structures.  The gestures are easy and fun – your students will enjoy swinging their arms around with the times in the song.

  1. Introduce a clock and review numbers 1 to 12. Start the lesson by bringing in a clock or alternatively make a craft clock using our clock shape craft sheet. Elicit and chorus the word “clock”.  Then point to number 1 and elicit the number.  Point to each number 1-12 in order and elicit the numbers (you can move the hour hand around as you do this).
  2. Practice recognizing numbers 1-12. Before class prepare twelve A4 sheets of paper with a number (1-12) written on each piece.  Place the numbers randomly around the walls of the classroom at a height where your student can reach them.  In class, draw your students’ attention to the numbers and say “Point to number 1″.  Everyone should point.  Then go through all the numbers 1-12.
  3. Play “Touch the numbers on the wall”. Get everyone standing in the middle of the classroom.  Shout “Touch Number 7!”.  Everyone should run and touch that number – it will be a mad scramble but good fun!  Then go through the rest of the numbers.
  4. Write the numbers on the board. Along the top of the board write the numbers in order 1-12. Divide the class into 4 teams and get each team to elect a representative to write on the board.  Have the 4 students come to the board and tell them they are going to race to write the numbers 1-12.  The winner will win a point for their team.  Say “Ready – Steady – Go!” and the 4 students race to write the numbers.  Then get another 4 students to have a go.  At the end the team with the most points is the winner.
  5. Teach the time vocab. Hold up your clock and set a time (e.g. 4 o’clock).  Ask the class “What time is it?”.  Elicit / teach “It’s 4 o’clock”.  Move the hand to another time, and ask again (you can also ask “Please could you tell me the time?”).  Go through the hours eliciting the times from the class until they have got the hang of the structures.
  6. Practice the gestures of the song. Stand everyone in front of you. Say “Point you hands at 1 o’clock” and demonstrate how to do this (hold one arm straight up at 12 and the other at 1).  Then say “Point you hands at 2 o’clock” … continue all the way round to 12 o’clock.
  7. Sing the “What Time Is It?” song. Now that everyone has got the idea of the actions for the song they should be ready. The teacher should also do the actions of the song and sing along so to encourage everyone to follow. Play the song through the first time and just focus on getting the actions right. After that play the song a couple more times and encourage everyone to sing as well.
  8. Do the Clock Craft Sheet.  Before class print out the clock shape craft sheet – enough so that each student has one. You can either cut out the shapes before class or have your students cut out the shapes in class. You will also need fasteners for each clock to fasten the arms to the clock.  After constructing the clocks, put students in pairs.  First model the activity with a student.  Student A sets a time on his/her clock and asks “What time is it?” or “Please could you tell me the time?”.  Their partner answers.  Each pair takes it in turn to ask each other.
  9. Play “What time do you?”. Still using the clocks, your students are going to show you the time they usually do things.  Ask the class questions, such as “What time do you usually wake up?” (if they are not sure you can use gestures to show what you mean). As you ask the questions, everyone should move the hands on their clock to the time they do these activities.  Then select some students to orally tell you their time (e.g. “I wake up at 7 o’clock”). We are only concentrating on “o’clock” for this lesson, so if students have times on their clock such as 7.20 you can teach “About 7 o’clock”.

    Other routine questions you can ask the time for could be: eat breakfast / lunch / dinner, go to bed, go to school, leave school, take a bath, do homework, brush teeth, etc.

  10. Set Homework: For homework, give out the “What time is it? It’s __ o’clock” worksheet.


Viewing all 53 articles
Browse latest View live